How to Repair a Hydraulic Cylinder?
Hydraulic Cylinder Repair starts with a careful diagnosis, not a wrench. A drifting load, an oily rod, or a slow cycle can point to different faults. Worn seals are common, but scoring, bent rods, damaged ports, or contaminated fluid may also be responsible. Guessing can waste parts and leave the real problem untouched.
Before disassembly, lower or securely support the equipment, isolate its power source, and release stored hydraulic pressure according to the machine’s service manual. Pressure can remain in a circuit even when the machine is off. Never search for a leak with bare hands; a fine jet can penetrate skin. If the system’s design or pressure-release procedure is unclear, stop and consult a qualified technician.
A sound repair depends on clean work, the correct replacement parts, and close inspection. Dirt on a new seal can cause another leak. A small scratch on the piston rod may damage fresh seals during each stroke. Record the cylinder’s dimensions and markings, compare parts with the manufacturer’s specifications, and inspect the barrel, rod, piston, and gland before reassembly. Details matter. Still, inspection has limits: damage that looks minor may need professional measurement. This guide explains how to identify common cylinder faults, prepare for repair, replace seals when appropriate, and test the cylinder safely. It also shows when repair is not the right call.
Isolate Pressure and Secure Loads Following ISO 4413 Safety Principles
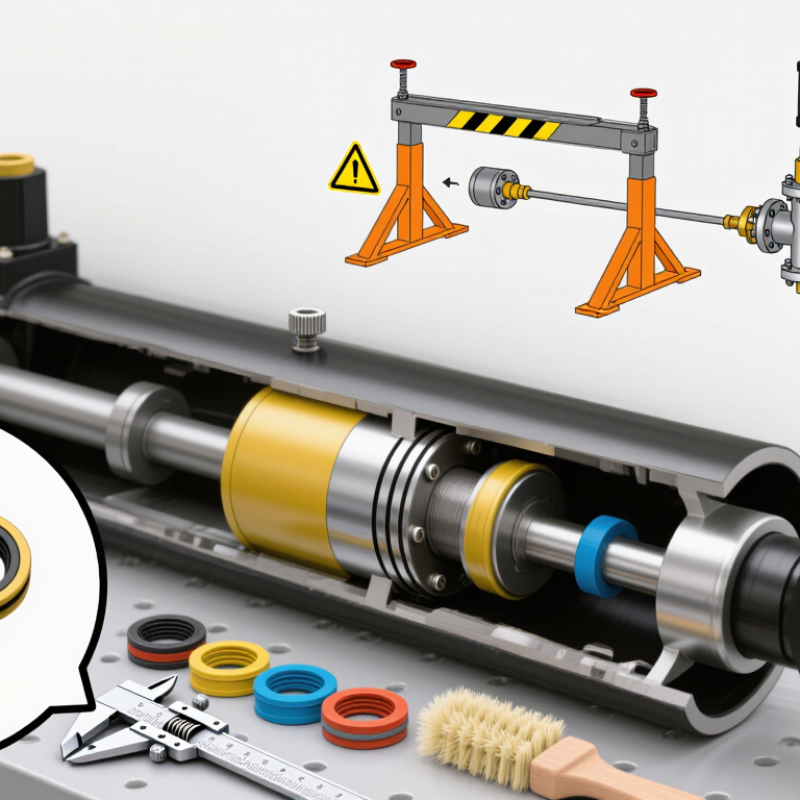
Before repairing a hydraulic cylinder, isolate every energy source, not just the pump. ISO 4413:2010 calls for hydraulic systems to be designed and operated with risks from pressure and stored energy controlled. Lower the load onto stable supports, or secure it with rated mechanical blocks; never trust the cylinder alone. Apply lockout and tagout, then relieve pressure according to the machine’s procedure, including any accumulator circuit. Check the gauge, but do not rely on it alone. Verify isolation using the designated test point. Pressure can remain trapped.
OSHA estimates that effective lockout/tagout practices protect nearly three million U.S. workers and prevent about 120 fatalities and 50,000 injuries each year. Those figures cover hazardous energy broadly, not hydraulic-cylinder repairs alone, but they show why isolation matters. A fitting can release a fine, high-pressure fluid jet that penetrates skin. Never loosen a connection to “see if pressure is gone.” Once pressure is verified as relieved, disconnect hoses carefully, cap open lines, and keep the work area clean. I have seen routine steps rushed when a repair seems simple; that is exactly when a second check helps.
Record Cylinder Bore, Rod, Stroke, and Rated Pressure Before Disassembly
Before loosening a hydraulic cylinder, record its bore, rod diameter, stroke, and rated pressure. These figures help identify a replacement seal kit and prevent mismatched parts. Measure the bore and rod with suitable calipers or a micrometer; note units and measurement points. Record the stroke from the machine specification or by carefully measuring the fully retracted and extended positions. Do not estimate from appearance. A few millimeters can matter.
Write down the cylinder’s rated pressure from its nameplate or reliable equipment documentation. ISO 6022:2006 covers mounting dimensions for a 25 MPa (250 bar) cylinder series; that figure is not a safe assumed rating for every cylinder. Record the cylinder’s own rating, along with port size, mounting style, and any visible damage. Photograph the nameplate and connections before disassembly. This checklist is easy to rush, and I may still miss a detail when parts are dirty.
Tips: Relieve system pressure and secure the load before disconnecting lines. Keep fittings clean, label hoses, and store measured parts separately. Never use a guessed pressure rating.
How to Repair a Hydraulic Cylinder? - Record Cylinder Bore, Rod, Stroke, and Rated Pressure Before Disassembly
Example pre-disassembly inspection record — confirm nominal specifications from the cylinder marking or equipment documentation.
| Record Item |
Example Value |
Unit or Reference |
Recording Notes |
| Cylinder identification |
CYL-01 |
Equipment maintenance record |
Use a job-specific identifier; do not rely on appearance alone when multiple cylinders are present. |
| Cylinder bore |
80 |
mm, nominal |
Record from the cylinder marking, drawing, or equipment specification before disassembly. Verify the actual bore during inspection after disassembly. |
| Rod diameter |
45 |
mm, nominal |
Record the specified rod diameter. After removal, measure the rod at several points and check for scoring, corrosion, bending, or wear. |
| Stroke |
500 |
mm |
Record the specified rod travel. If measuring, compare the fully retracted and fully extended positions using the same reference points. |
| Rated pressure |
21 |
MPa |
Record the cylinder’s rated working pressure from its marking or documentation; do not substitute the system relief-valve setting. |
| Port connection |
SAE straight-thread, O-ring seal |
Connection type |
Verify the connection type and size before ordering fittings or replacement components. |
| External condition |
Light rod scoring; oil residue near rod seal |
Visual observation |
Photograph visible damage and note any leakage, corrosion, loose fasteners, or damaged ports before cleaning. |
| Recorded on |
2026-11-20 |
Date |
Record the inspection date and the technician or work-order reference in the maintenance log. |
Safety: Before disconnecting or disassembling a cylinder, isolate the equipment, relieve hydraulic pressure, support the load, and follow the applicable service procedure.
Inspect the Rod, Bore, and Seals Against Manufacturer Wear Limits
How to Repair a Hydraulic Cylinder?
Before opening a hydraulic cylinder, relieve system pressure and secure the load. A suspended load can move unexpectedly. Clean the exposed rod before inspection, so dirt does not hide damage or enter the assembly. Check the rod for scoring, pitting, rust, and visible bends. Measure its diameter at several points with a micrometer, then compare readings with the manufacturer’s wear limits. A polished strip may look harmless, but even slight damage can cut a new seal.
Inspect the bore for scratches, corrosion, and uneven wear. Use suitable measuring tools to check its diameter at different depths and in two directions. This helps reveal taper or ovality that a quick visual check can miss. Compare every reading with the cylinder’s specified limits. Examine seals for flattened lips, cracks, hardening, or cuts, and look for wear patterns that may point to rod or bore damage. It is easy to blame the seal. That may be wrong.
Tips: Keep parts clean and record measurements before ordering replacements. Use the service documentation for limits; do not rely on a generic tolerance. If readings are unclear, pause and confirm the measurement method. A borderline result deserves another check.
Replace Seals and Maintain Typical ISO 4406 Fluid Cleanliness of 18/16/13
Before opening a hydraulic cylinder, release stored pressure and secure the machine against movement. Drain the oil into a clean container, then remove the cylinder and clean its exterior. Dirt around a port can enter the system during disassembly. Mark the orientation of the end cap and piston parts; small details are easy to forget once components are on the bench.
Inspect the rod for scratches, corrosion, or bending, and check the bore for scoring. Replace worn seals with parts specified for the cylinder’s pressure, fluid, and temperature. Keep new seals covered until installation, and use a suitable lubricant to prevent damage during fitting. A seal can look correct yet fail quickly if a sharp edge nicks it. It happens.
Fluid cleanliness matters just as much as the repair. ISO 4406 cleanliness code 18/16/13 represents particle-count ranges at sizes greater than 4, 6, and 14 micrometres. Confirm the target against the equipment maker’s requirements, since some systems need cleaner fluid. Use filtered oil, clean tools, capped hoses, and a properly maintained filter. Flush contaminated lines before reconnecting the cylinder, then test for leaks and smooth movement at low pressure. Take a fluid sample after operation; clear-looking oil is not proof of cleanliness. Shop conditions vary, and that part is easy to underestimate.
Bleed Air and Pressure-Test to the Manufacturer’s Specified Rating
How to Repair a Hydraulic Cylinder?
After replacing seals or opening a cylinder, bleed trapped air before applying full pressure. Air can make the rod move unevenly and cause sudden movement. Secure the cylinder, connect clean hydraulic lines, and keep people clear of the rod’s path. Start at low pressure. Extend and retract the rod slowly through several cycles, following the equipment manufacturer’s procedure. Pause if motion jerks or fluid foams.
Small details matter.
Then pressure-test with a calibrated gauge, using the manufacturer’s specified rating and hold time. Never substitute a generic pressure multiplier; cylinder designs and test requirements differ. Increase pressure gradually, watch for external leakage, and check that the rod holds position. ISO 10100:2020 describes acceptance tests for hydraulic cylinders, including leakage and proof-pressure testing. Cleanliness matters, too: ISO 4406:2021 codes hydraulic-fluid particle counts at 4, 6, and 14 micrometres. Keep open ports capped and use filtered fluid to avoid adding contamination during repair. If pressure falls, stop and investigate before repeating the test. A gauge reading alone cannot confirm safe operation.