

7 Tips for Choosing a Foam Filled Mooring Buoy?

Ports depend on reliable mooring systems to keep vessels secure through changing tides, wind, and traffic. UNCTAD’s Review of Maritime Transport 2024 reports that seaborne trade grew by 2.4% in 2023. That growth reinforces the value of dependable marine infrastructure, though it does not determine which buoy suits a particular berth.

A Foam-Filled Mooring Buoy can offer reserve buoyancy and reduce the risk of sudden deflation compared with an air-filled design. But foam alone does not make a buoy suitable. Buyers must consider vessel loads, chain and shackle ratings, water depth, wave exposure, and the buoy’s connection points. Small details matter. A worn lifting lug or poorly matched mooring line can undermine an otherwise robust product.

PIANC’s technical guidance on marine fender systems emphasizes assessing site conditions and vessel interactions when designing berth protection. Mooring Buoy selection also demands site-specific engineering; fender guidance is not a substitute for buoy-load calculations. The right choice depends on actual operating conditions, not a product photograph or one headline capacity figure. Even a buoy that looks oversized may lack adequate reserve buoyancy or suitable hardware. That is easy to overlook.

The following seven tips explain what to check before purchase, from buoyancy and materials to load documentation, inspection access, and supplier support. Use them as a screening guide, then confirm critical loads with a qualified marine engineer. No checklist removes uncertainty. Real sites are messy, and that deserves honest attention.
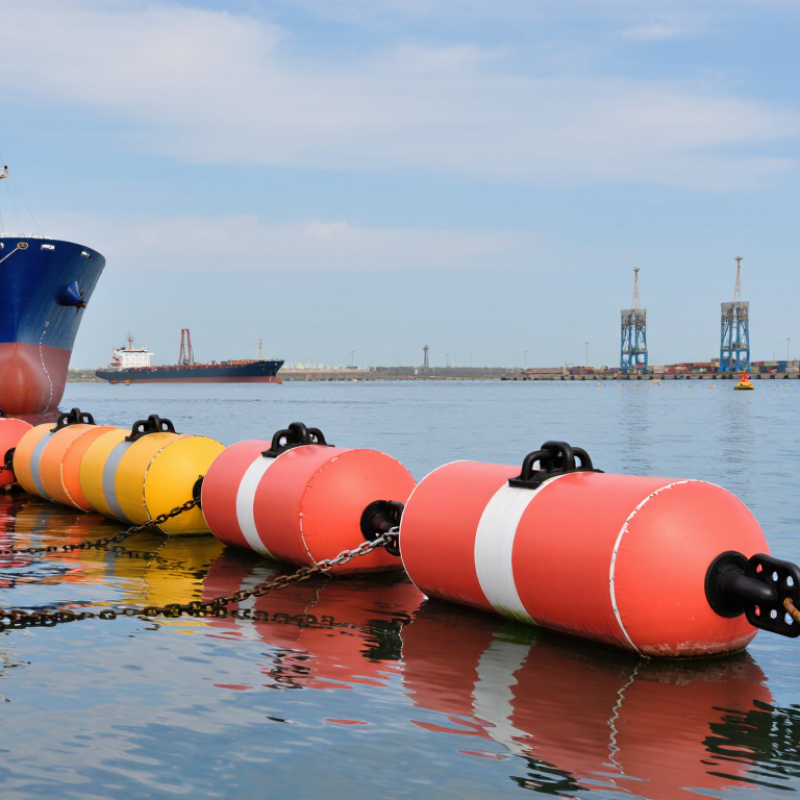
7 Tips for Choosing a Foam Filled Mooring Buoy?

Identify the Mooring Application and Environmental Conditions

A foam-filled mooring buoy should match the job, not just the vessel’s size. A swing mooring in a sheltered harbor faces different loads from a buoy exposed to swell, strong currents, or passing wakes. Record the largest expected vessel displacement, water depth, tidal range, and line arrangement. Then check local wind, wave height, and period records from NOAA’s National Data Buoy Center or the relevant regional monitoring service. A single calm-season visit is not a design dataset. Small details matter.

Consider the site through the buoy’s full service life. In its 2022 Sea Level Rise Technical Report, NOAA projects 10–12 inches (0.25–0.30 meters) of average rise along the contiguous U.S. coast by 2050, relative to 2000. That is not a site-specific forecast, but it can affect clearance, line angles, and access over time. In exposed or debris-prone water, also assess abrasion, impact, UV exposure, temperature, and possible ice loads. Foam filling can help retain buoyancy after shell damage, but it does not remove the need to size the buoy, chain, and anchors for actual loads. Review the assumptions with a qualified mooring designer. I’d still question any selection based only on catalog capacity.

Calculate the Required Buoyancy and Load Capacity

Start with the load the buoy must support, not its advertised size. Add the submerged weight of the chain, fittings, and any attached equipment. Include the buoy’s own weight when checking total displacement. In seawater, one cubic metre of displaced volume provides roughly 1,025 kilograms of gross buoyancy; freshwater provides less. Subtract the buoy’s weight to estimate usable lift. Keep units consistent. It is an easy detail to miss.

Tip: Check peak loads, not just the calm-water figure. Waves, current, and vessel movement can create sudden tension. Use the mooring layout and local conditions to estimate these forces, then compare the result with the buoy’s rated working load. Do not treat buoyancy capacity and mooring-load rating as interchangeable.

Tip: Leave reserve. A buoy operating near its calculated limit has little room for changing conditions, added hardware, or uncertain measurements. Apply a suitable design margin based on the project and qualified engineering guidance; there is no single margin for every mooring. Confirm the manufacturer’s stated ratings and inspect the shell, attachment points, and fittings before installation. Foam filling can help limit water entry after damage, but it does not make a damaged buoy reliable. Recheck the numbers if the chain length changes.

7 Tips for Choosing a Foam Filled Mooring Buoy: Calculate Required Buoyancy and Load Capacity

The chart shows illustrative design loads and target net buoyancy calculated using a 1.5 reserve factor. Use the total design load for your mooring arrangement, then check that the buoy’s available net buoyancy meets or exceeds the target. Account for buoy weight, attached hardware, site conditions, and dynamic environmental loads when selecting a buoy.

Compare Foam Core and Protective Shell Materials

A foam-filled mooring buoy relies on two different materials: the core provides reserve buoyancy, while the shell resists abrasion, impact, and water entry. The U.S. Army Corps of Engineers’ Coastal Engineering Manual uses about 1,025 kg/m³ as seawater density. One cubic metre of displaced seawater therefore provides roughly 10.1 kN of buoyant force, before subtracting buoy weight or allowing for mooring loads. Treat this as a design starting point, not a safe working-load rating.

For the core, compare closed-cell foam density, compression strength, and water absorption—not just the word “foam.” ASTM D1621 measures compressive properties of rigid cellular plastics; ASTM D2842 tests their water absorption. Ask for test results from the actual foam formulation. Small detail. A damaged shell can let water reach the core, reducing reserve buoyancy over time.

Shell choice affects how the buoy handles daily contact. High-density polyethylene can flex under impact; fiberglass-reinforced plastic can provide a stiffer surface, but cracks need close inspection. Compare shell thickness, UV-resistance data, repair methods, and seam construction. A thicker shell is not automatically better: added mass reduces usable buoyancy. Not always an obvious trade-off. Check the complete buoy’s rated capacity and inspect likely wear points, especially around lifting eyes and mooring attachments.

Evaluate Buoy Design, Hardware, and Visibility Features

A foam-filled mooring buoy should retain useful reserve buoyancy under its actual working load, not just look substantial at the dock. Check the stated buoyancy against chain weight, fittings, and expected water-level changes. Ask for shell-thickness details, impact-test records, and a documented safe working load for every lifting point. Inspect welds and attachment plates closely; small gaps around a plate can invite corrosion. The OCIMF Mooring Equipment Guidelines (MEG4, 2018) distinguishes line design break force from working loads, a useful reminder not to treat a connector’s breaking strength as its safe operating limit. Do not guess.

Visibility deserves equal attention. IALA’s Maritime Buoyage System describes five mark types, each using defined color and shape cues; choose a buoy whose markings match its intended function. IALA Recommendation R0201 lists nominal light-range categories including 2, 3, 4, 5, 6, and 10 nautical miles. Match the light to local viewing distance and background lighting, then confirm the rating in the product documentation. Add reflective panels where crews approach by workboat, and check that hardware does not hide them from common viewing angles. A bright color helps, but glare, spray, and a low winter sun can still flatten contrast. I would not rely on color alone.

Check Installation Needs, Maintenance, and Service Life

A foam filled mooring buoy should suit the vessel, water depth, and expected loads—not just look large enough. Check the buoy’s rated buoyancy and the load limits of its chain, shackles, and attachment points. Tip 1: Measure the actual water depth and tidal range. Tip 2: Allow for current, wind, and vessel movement. A simple site sketch can prevent awkward surprises during installation.

Tip 3: Confirm that lifting equipment can safely handle the buoy and its hardware. Tip 4: Check the anchor position and swing clearance before deployment. Keep connections accessible for inspection, and secure pins against loosening. Installation is not always tidy; muddy water and poor visibility can make small errors easy to miss. Verify each connection before the buoy is put under load.

Tip 5: Inspect the outer shell for cuts, impact damage, or exposed foam. Tip 6: Check chains and fittings for wear, corrosion, and distortion, especially after storms. Tip 7: Record inspection dates and any repairs. Small details matter. Rinse off salt and debris where practical, and follow the manufacturer’s care guidance. Service life depends on exposure, loading, and maintenance, so avoid relying on a fixed lifespan alone. Replace damaged hardware promptly, and reassess the setup if vessel size or conditions change.

7 Tips for Choosing a Foam-Filled Mooring Buoy? — Check Installation Needs, Maintenance, and Service Life

Tip What to Check Installation and Maintenance Guidance Service-Life Considerations
1. Match buoyancy to the load Confirm the required working load and reserve buoyancy, accounting for the mooring line, hardware, vessel loads, and local conditions. Have the mooring system sized for the site’s water depth, exposure, seabed, and expected environmental loads. Do not select by buoy diameter alone. Overloading can accelerate damage and compromise performance. Reassess the system if vessel size, use, or site conditions change.
2. Check the foam and outer shell Look for closed-cell foam and a durable, impact-resistant outer skin suited to the water, weather, and handling conditions. Inspect the shell for cuts, cracks, deep abrasion, or exposed foam. A sealed outer skin helps limit water ingress if the buoy is damaged. UV exposure, impacts, and abrasion can shorten service life. Protective coatings or covers may help when compatible with the buoy design.
3. Choose suitable attachment hardware Check the strength, material, and configuration of the central rod, eyes, shackles, and other load-bearing fittings. Confirm that connections fit the chain or rope and are compatible with the operating environment. Use corrosion-resistant materials appropriate to local water conditions. Metal fittings can corrode, wear, loosen, or fatigue. Inspect connection points closely and replace damaged or excessively worn components.
4. Plan for the actual installation site Account for water depth, tidal range, current, wave exposure, vessel traffic, and available clearance. Verify that the buoy, mooring line, and anchor arrangement are suitable for the site. Check navigation and permit requirements before installation. Chafing, repeated impact, and harsh exposure can increase wear. Review the location if the buoy regularly contacts structures, vessels, or the seabed.
5. Make handling and retrieval practical Consider buoy dimensions, weight, lifting points, transport access, and the equipment available for deployment and recovery. Use designated lifting points and suitable lifting equipment. Avoid dragging the buoy over rough surfaces or lifting it by fittings not designed for lifting. Careful handling reduces punctures, shell damage, and stress on attachment hardware during installation and maintenance.
6. Set up a routine inspection plan Inspect buoyancy, shell condition, fittings, mooring lines, and signs of movement or abnormal wear. Inspect before deployment and at intervals based on risk and site conditions; check again after severe weather or a reported impact. Record findings and repairs. Inspection frequency should reflect exposure, use, and applicable operating requirements. Repair or remove a buoy if its integrity or flotation is in doubt.
7. Evaluate the whole-life cost Compare initial cost with expected inspection, hardware replacement, repair, transport, and eventual disposal needs. Ask for care instructions, repair guidance, and information on available replacement parts. Keep installation and inspection records for future decisions. There is no universal service-life figure: actual life depends on design, loading, UV exposure, abrasion, impacts, and maintenance. Replace the buoy when damage or loss of performance cannot be safely corrected.
Share by: